Can you believe this is the first quiche recipe I’ve ever uploaded?! For a self-proclaimed comfort foodie, I’m disappointed it’s taken me this long. But, the wait is worth it, I promise. Follow me…
Homemade Quiche Crust
Aka shortcrust pastry. It’s not often you’ll see me making pastry on this blog, but for shortcrust I can make an exception, given how simple it is to make. It’s actually one of the first things I ever learned to cook back in D&T at school and it’s a method that’s stuck with me ever since. Whilst you can use a food processor, which I’ll give instructions for in the recipe card below, I’m pretty old school and prefer making it by hand. You know, just to feel at one with the food.
Shortcrust Pastry Ingredients
Flour – Plain/All Purpose flour does the trick. Butter – I prefer unsalted butter with added salt, but you can use salted if that’s what you’ve got on hand. Salt – Always remember to season your pastry! Water – Must be cold (see below).
Keeping everything cold
The key to great shortcrust pastry is ensuring the butter stays cold. This is what creates that iconic flaky/crumbly texture. In order to keep the butter cold, you’ll want to work fairly quickly so the butter doesn’t melt and turn the dough greasy. Using cold water is essential too, as is handling the dough as little as possible.
Minimal handling
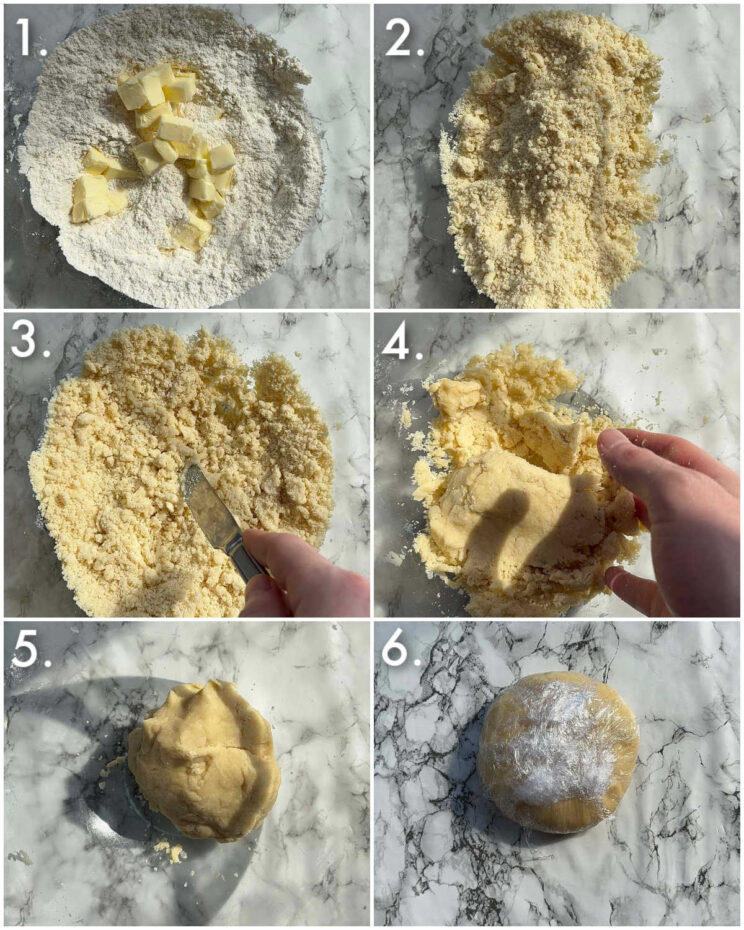
You don’t want to knead the dough or squeeze it too much, as this will develop gluten and result in a firm pastry. Also, the more handling, the warmer the dough gets. Process shots: whisk salt & flour then add cold butter (photo 1), rub into a crumb-like texture (photo 2), cut/mix in water (photo 3), form dough (photos 4&5), tightly wrap and chill (photo 6).
Blind Baking
Blind baking the pastry helps give it a kickstart before you add the filling. It’ll partially cook, which helps prevent the filling from soaking into the dough and causing it to go soggy.
What can I use to blind-bake the pastry?
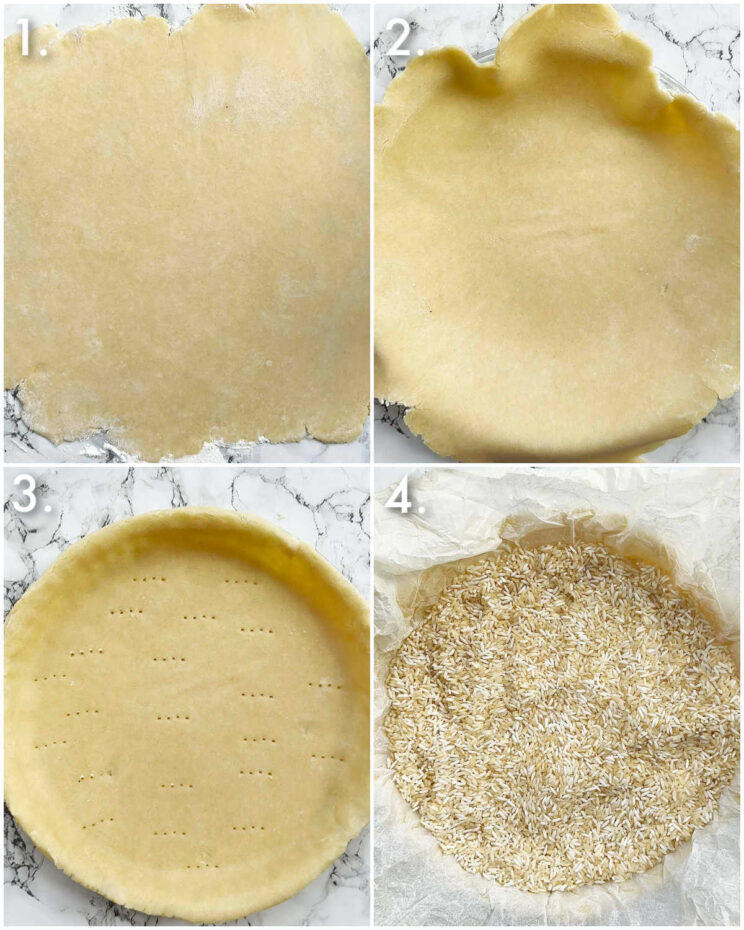
You’ll first want a layer of baking paper or foil, then on top of that, you want something that will weigh it down and won’t burn in the oven. Pie beads or dry beans are great – here I opt for uncooked rice. Once you’ve rolled out the dough and added it to the pie dish, you’ll want to prick the base with a fork. This will help prevent air bubbles from forming, which in turn causes the pastry to crack as it cooks. Process shots: roll out dough (photo 1), add to greased dish (photo 2), trim then prick (photo 3), add pie weight and bake (photo 4).
Quiche Lorraine Filling
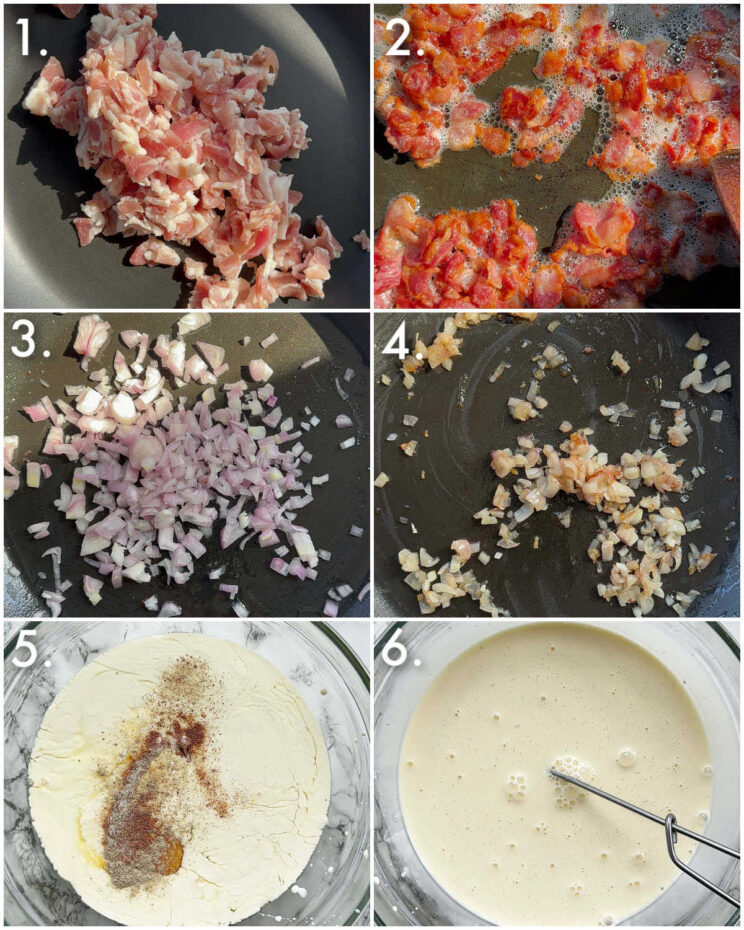
The fillings for a classic Quiche Lorraine are fairly minimal, but they all work together so well to create the most delicious quiche! Here I’m just frying off some bacon and then using the leftover fat to fry some shallots. For the cream filling you’ll want a base of eggs and double/heavy cream, alongside a simple seasoning mix. Double cream is essential for its thick texture, which will easily set as the quiche bakes. Plus it adds a gorgeous richness to the quiche – and let me tell you this quiche is RICH 😛 Process shots: fry bacon (photos 1&2), fry shallots (photos 3&4), add cream, eggs, nutmeg, salt and pepper to bowl (photo 5), whisk (photo 6).
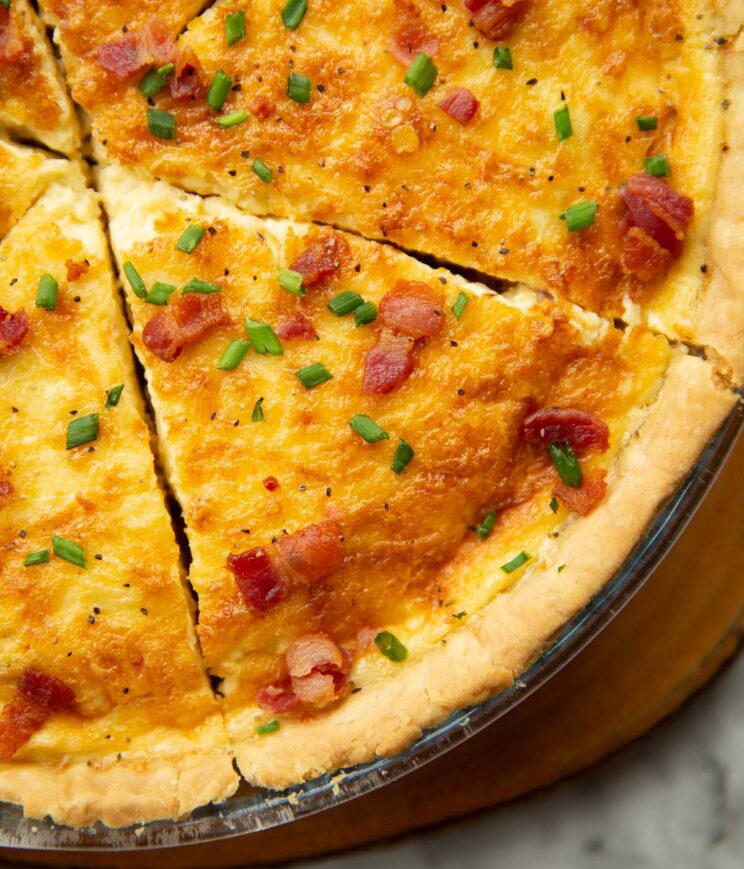
Quiche Lorraine
The final piece of the quiche puzzle is, of course, cheese. For this recipe, I LOVE a 50/50 combo of Cheddar and Gruyere. The Cheddar adds a real punch of flavour, whilst the Gruyere adds a gorgeous nutty flavour.
Layering the quiche
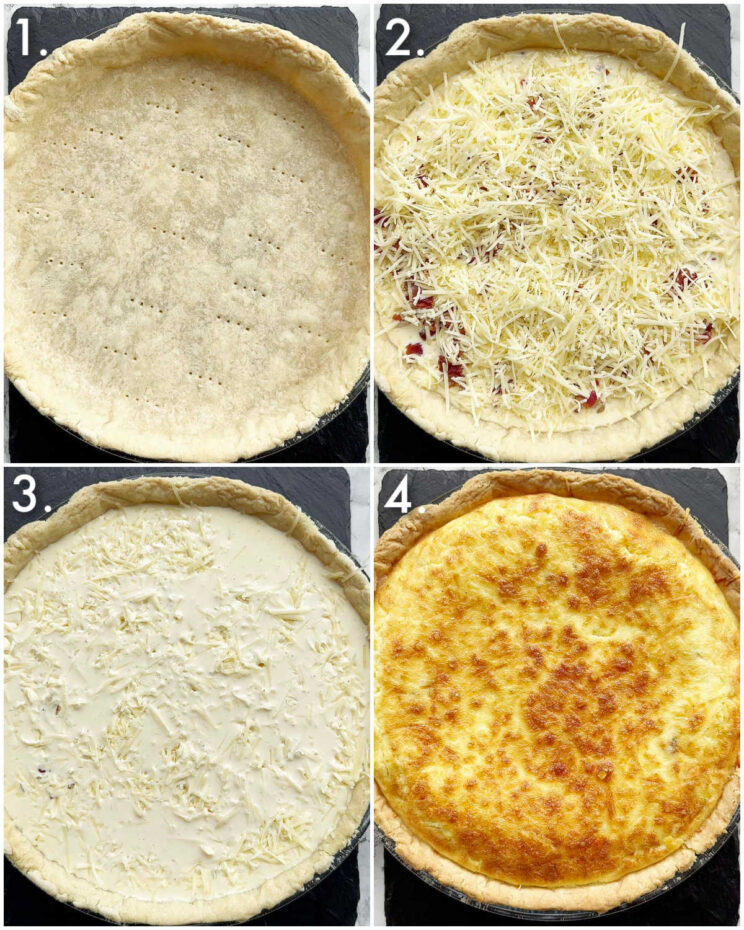
The perfect quiche is one where the fillings are evenly distributed. At the end of the day, quiches are gonna quiche, so there will be some sinkage. But, to help prevent this I recommend layering the fillings. Here I do bacon & shallots, then cheese, then cream. Repeat and you’re good to go. Process shots: bake pie uncovered (photo 1), create one layer (photo 2), create second layer (photo 3), bake (photo 4).
How do I know when the quiche is cooked?
The top will be golden and the centre will be just about set (you can check with a knife). It will still jiggle a little and will carry on cooking as it rests.
Can I use store-bought pastry?
Sure! Just roll out the pastry and continue the recipe.
How do I prevent the pastry from cracking?
This can sometimes happen when blind-baking. Poking holes will help, as will making sure the oven temp is correct (too high and it’ll burn/crack). I’ve added a note on this in the recipe card below!
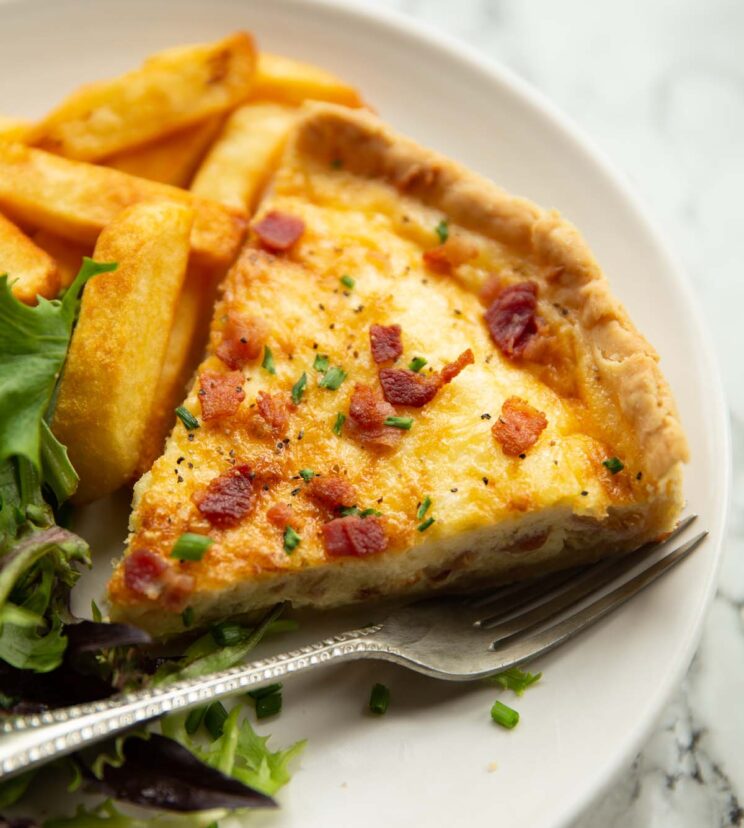
Serving Quiche Lorraine
Once out of the oven, let the quiche rest, then garnish with chives and more bacon! Here I’ve served with chips and a side salad, but it’s honestly pretty perfect as it is. For another quiche recipe check out my Breakfast Quiche Stuffed Bagels! Alrighty, let’s tuck into the full recipe for this Quiche Lorraine shall we?!
How to make Quiche Lorraine (Full Recipe & Video)