Turkey Brine:
Whole Turkey – Any size works, but you’ll need to thaw it first. I’ve got a chart for thawing times in my Thanksgiving turkey recipe post. Kosher Salt – You could use sea salt, but it’s pricier, so I stick with kosher salt for this recipe since you need a lot. It’s key for making the turkey juicy! Water
You can actually cook my spatchcock turkey recipe without brining it, due to the flavorful compound butter under the skin and quick cooking, but I still recommend brining first for the juiciest result! If you decide to skip it, you can do a dry brine in the fridge overnight after spatchcocking and seasoning.
Since turkey bones are thicker and tougher than chicken, I recommend these heavy-duty shears or an electric knife to cut through them more easily. Some people cook their spatchcocked turkey on the grill or smoker, but I prefer the classic oven method. Here is my favorite way to cook it: I highly recommend inserting a probe thermometer into the thickest part of the breast, and it will beep when your turkey is done — no need to open the oven! A regular instant-read thermometer will work, though. The target internal temperature is 165 degrees F, but I usually take it out 5 degrees sooner, as the temp will rise while it rests.
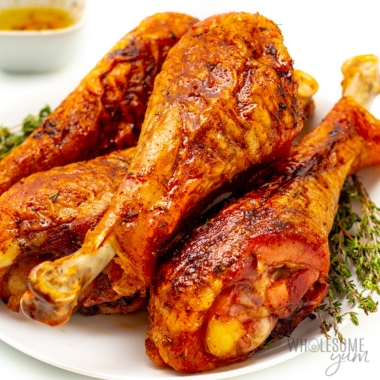
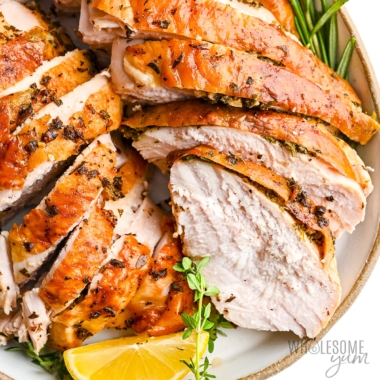
If you can, let your turkey come to room temperature before roasting. Let it rest on the counter for about 30 minutes. Bringing it to room temperature helps it cook more evenly, but if you’re pressed for time, you can skip this step. Can you roast spatchcock turkey without a wire rack? Yes, but it’s better with one because it allows the heat to circulate, giving you crispy skin all over. This is the set I’ve used for years. It’s nonstick and large enough for a turkey! But if you need a last-minute alternative, you can use a regular rimmed sheet pan piled with large pieces of onion, celery, and/or carrots — they’ll elevate the turkey a bit like a rack. If the skin is getting too dark, tent the top with foil. I usually check on the turkey every 10 minutes starting at the 45-minute mark to see if I need to cover it. Larger turkeys take longer to roast, so are more likely to need this step, while smaller ones usually don’t. Carving is easier than a regular roasted turkey. Use a sharp knife or kitchen shears to separate the legs from the breast, cut the drumsticks from the thighs, and remove the wings. Then, slice the breast meat.
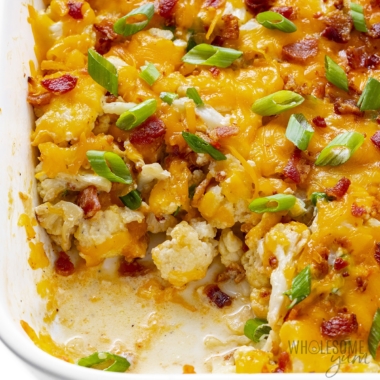
Sauces – Sugar-free cranberry sauce (pictured above) is my most popular Thanksgiving recipe of all! But if you’re craving gravy to drizzle over everything, just strain the turkey drippings, simmer with butter and chicken broth, then whisk in a slurry of the broth mixed with cornstarch or gelatin to thicken. So good! Sides – My healthy green bean casserole and sweet potato casserole are the classics I can’t live without. You can also mix it up with mashed cauliflower, smashed brussels sprouts, or roasted root vegetables (either mixed or individual ones like kohlrabi or turnips). Salads – My plan this year is either my Thanksgiving salad or fall salad. For December holidays, try my Christmas salad or winter salad. Dessert – My crustless pumpkin pie is easier than making a crust! Or add buttery almond flour cookies or healthy oatmeal cookies for a little variety.
Please enter your first name for your account. Your saved recipe will also be sent to your email. I recommend inserting a probe thermometer into the thickest part of the breast, so it will beep exactly when it’s done, but you can also check with a meat thermometer. 165 degrees is the target internal temperature, but for the juiciest turkey, aim for 160 degrees, and then cover in foil immediately after removing from the oven (temperature will continue to increase in the next step). If the skin starts to brown too much before it’s ready inside, cover it with foil and continue baking until done (I covered mine after 45 minutes).
Tips: Check out my recipe tips above to help you get super juicy turkey with crispy (but not burnt) skin, and how to carve it easily. Store: Keep leftover turkey in the fridge for up to 3-4 days. Prep ahead: Brine and season up to 2-3 days in advance, then refrigerate until ready to roast. You can even leave it uncovered for 24 hours, which will make the skin more crispy when you roast! Leftover ideas: Leftovers are great for sandwiches, soups, and salads. I especially love using them for my leftover turkey casserole and turkey soup. Reheat: Warm in the oven at 350 degrees F. I recommend adding a little broth to the bottom of your baking dish and covering with foil, which will keep the meat juicy. Freeze: Remove the meat from the bones, and store in the freezer for up to 3 months.


![]()


![]()


![]()
![]()