If you love Thai street food, fried chicken or just darn tasty food you are in for one heck of a treat today! Follow me…
Thai Fried Chicken
What is Thai Fried Chicken?
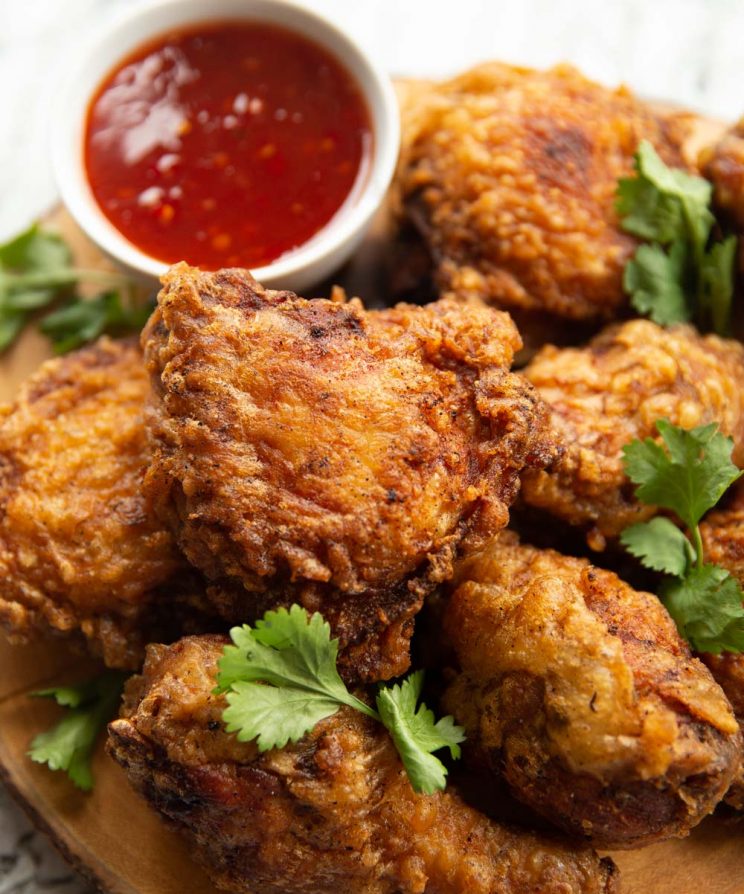
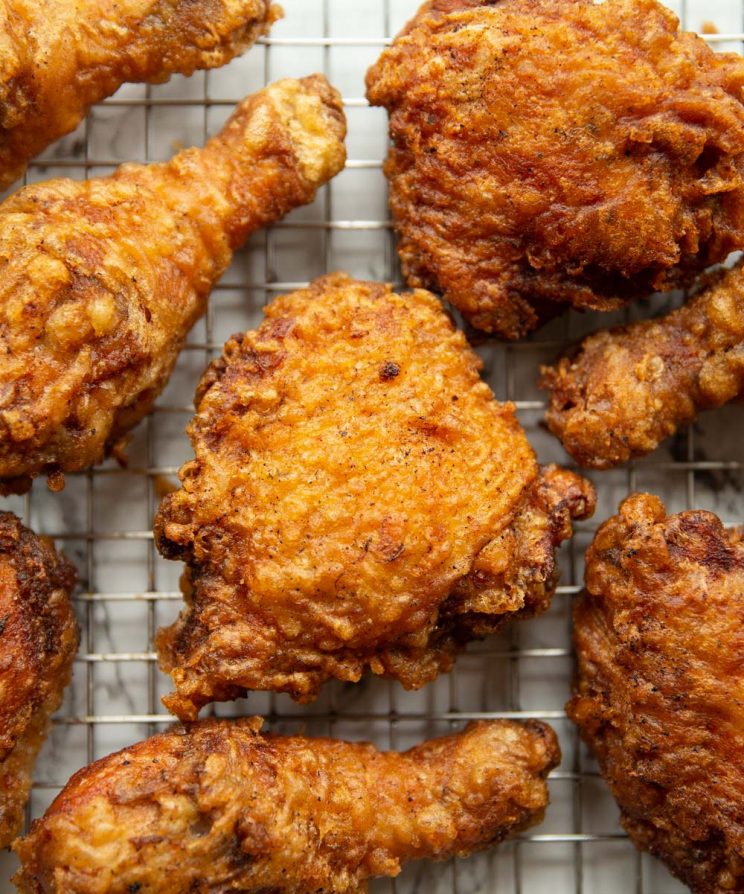
Thai fried chicken is also known as ‘Hat Yai fried chicken’ due to its roots in the southern city of Thailand. This chicken is a popular street food dish across Thailand. It has a gorgeous colour, where the sugar in the recipe comes to the surface and caramelizes in the oil. Its flavour is unique, offering a really deep garlicy, salty flavour.
Is this recipe authentic?
I’m very fortunate to have Thai family, so the base of this recipe was kindly been passed down to me. I’ve just tweaked a few things here and there to make it approachable without an Asian supermarket. Having eaten copious amounts of fried chicken in Thailand I’d say this recipe is on the money! (I mean, if I do say so myself 🤣)
How to Prepare Thai Fried Chicken
For this recipe you’ll want to use bone in skin on chicken. Bone in meat tends to be more tender and juicy, whilst skin on offers you extra flavour and a gorgeous crispy casing. I’ve mostly experienced chicken thighs in my travels through Thailand, but you can really use any cut you like. Here I use thighs and drumsticks.
Thai Fried Chicken Marinade
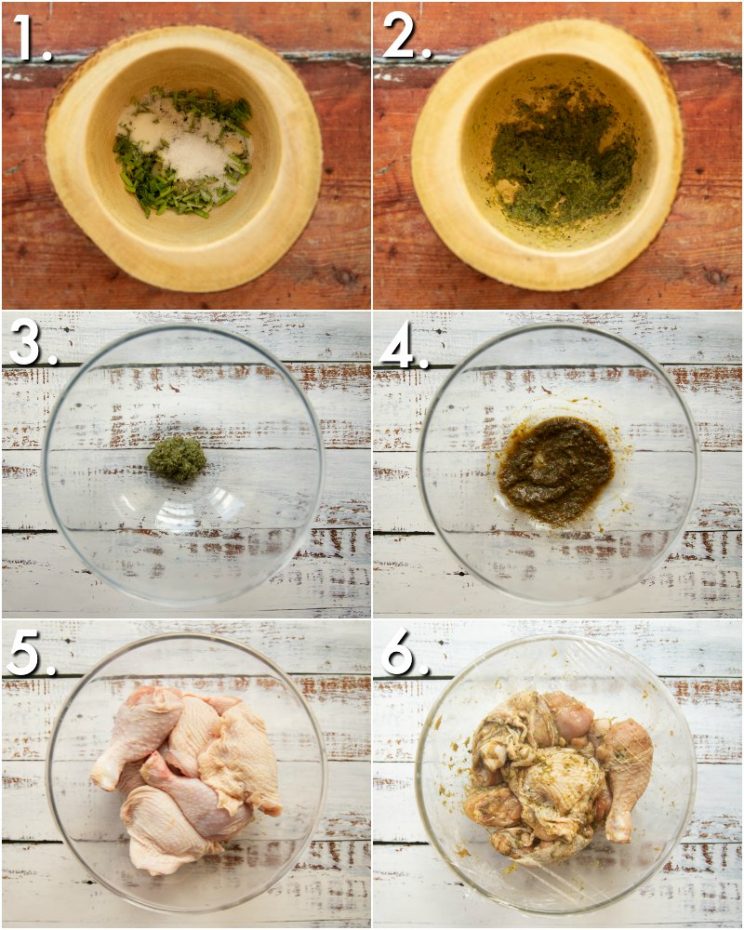
For the marinade you only need a few simple ingredients. It’s best made in a pestle and mortar, but if you don’t own one you can finely dice then mash the ingredients with the side of your knife until a paste forms. Here’s what you’l need:
Coriander/Cilantro Root – If you want to get large coriander roots you’ll have to head to an Asian supermarket. Here I just use the tiny roots that come with store bought coriander, along with some of the coriander stem. Both of these have a much more intense flavour than the coriander leaves. White & Black Pepper – These offer different flavours so make sure you use both. Garlic – and lots of it! 5 cloves to be exact. Salt – Helps grind everything into a paste. Sugar – Gives that gorgeous deep golden colour once the chicken has fried.
How long to marinate for?
I recommend a minimum of 4 hours, but the longer the better. You’ll find best results overnight, but even just an hour will work wonders. In all cases make sure you really rub the marinade into the chicken. Process shots: add marinade ingredients to pestle and mortar (photo 1), grind into a paste (photo 2), add to large bowl (photo 3), add soy sauce and oyster sauce (photo 4), add chicken (photo 5), combine and marinate (photo 6).
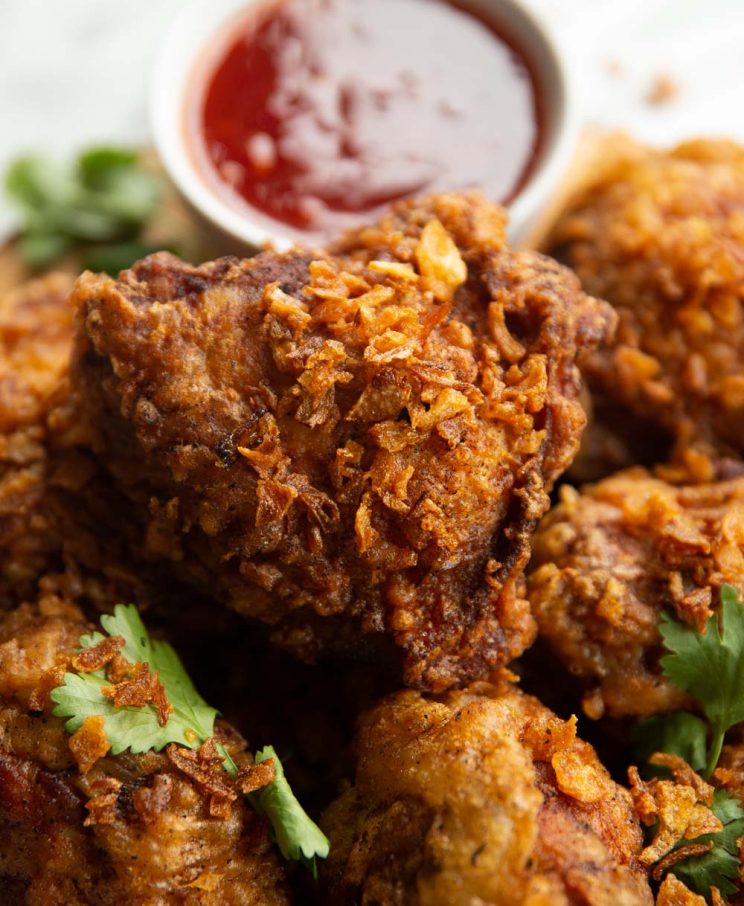
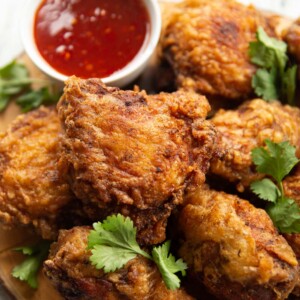
Crispy Fried Shallots
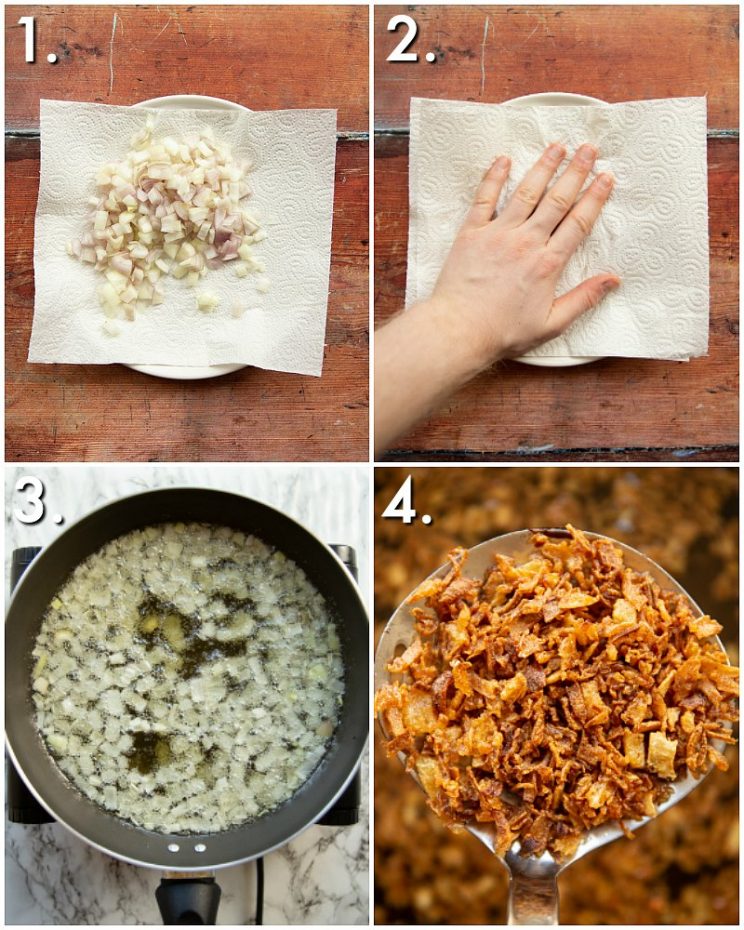
A traditional way to serve Hat Yai fried chicken is to sprinkle over crispy shallots. Now, you can buy these pre-made BUT they are incredibly easy to make at home. There’s just two tips I recommend:
Moisture – You want to remove as much moisture from the shallots as possible to ensure they go nice and crispy. To do this I recommend just pressing them between two sheets of paper towel. Low and Slow – Whilst you might believe that cranking up the heat will get you crispy onions, the opposite is actually true. You want the heat fairly low in order to slowly draw out as much moisture as possible. Plus, shallots go from perfect to burnt VERY quickly.
You can either fry the onions before or after you fry the chicken. The advantage of doing it before is you’ll then get all that gorgeous flavour in the pan ready for the chicken. The disadvantage is they aren’t quite as crispy as they’ll sit there for a little while as the chicken cooks. Process shots: add shallots to paper towel (photo 1), press out moisture (photo 2), add to oil (photo 3), deep fry until golden and crispy (photo 4).
Thai Fried Chicken Batter Mix
When it comes to the crispy batter, a lot of recipes use rice flour. I actually find the best flour to be Tempura flour. Tempura flour is loaded with a few extra goodies (baking powder, cornflour) that results in extra crispiness. I have also made this recipe with regular plain/all purpose flour and it still works great.
Soda Water
The secret ingredient in the batter is soda water. This ensures the batter contains lots of tiny little air bubbles, which gives it that flaky/airy finish. One rule – you must make sure your soda water is COLD. This will cause more of a reaction when the batter hits the hot oil and will result in more tiny bubbles i.e extra crispiness. Process shots: add tempura flour to bowl (photo 1), pour in soda water (photo 2), dredge chicken (photo 3), add to hot oil (photo 4), deep fry until golden and crispy (photo 5).
Fry in batches!
Really important to make sure you fry the chicken in batches of 3-4. This will not only ensure the chicken doesn’t stick together, but it’ll also ensure the oil temp doesn’t drop too much. Once you’ve fried the chicken lay it on a cooling rack with paper towels underneath to catch excess oil. You can also add a pinch of salt, which will help draw out the final bit of moisture from the batter.
What to serve with Thai Fried Chicken?
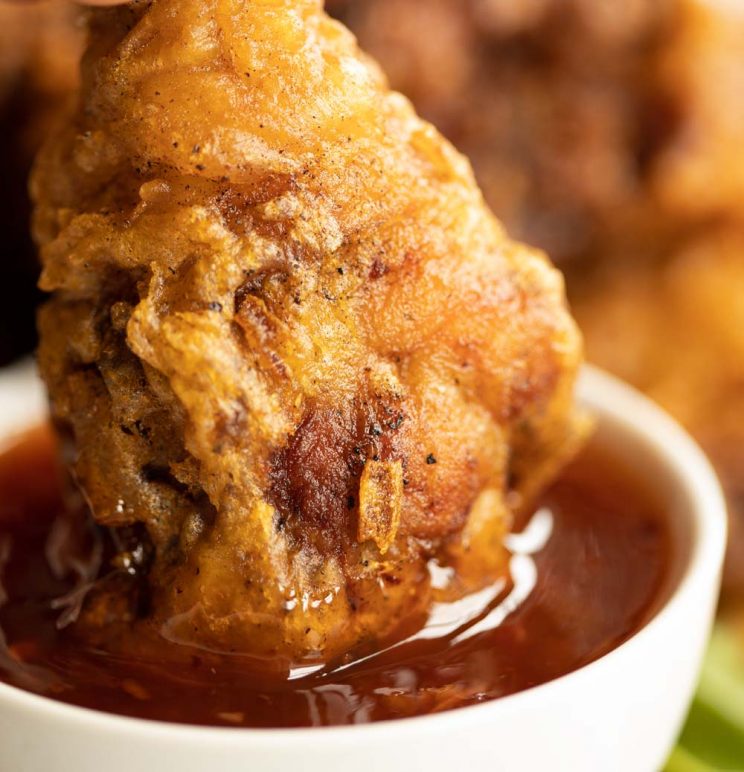
Crispy shallots go straight over the top. Alongside that I highly recommend a dip – here I’ve used Thai Sweet Chilli Sauce. Alongside this if I want to make it into more of a meal I’ll add sticky rice.
And there we have it! All my top tips for perfect Thai fried chicken. For more awesome Thai recipes check out my Thai Spring Rolls, Thai Pork Toast and Chicken Thai Green Curry! For more similar recipes make sure you check out these beauties:
Fried Chicken Recipes
Buttermilk Fried Chicken Spicy Chicken Tenders Popcorn Chicken Chicken Fried Potatoes Crispy Chicken Burgers
Alrighty, let’s tuck into the full recipe for this Thai fried chicken shall we?!
How to make Thai Fried Chicken (Full Recipe & Video)
If you loved this Thai Fried Chicken Recipe then be sure to Pin it for later! Already made it or got a question? Give me a shout in the comments and pick up your free ecookbook along the way!